
How to Start a Website or Blog
Here is an outline of the first steps to starting a website or blog that will save you time and get you started. There are 9 super quick and easy steps on how to start a website or blog. I will explain the terminology and walk you through the details. I have even included my discounted link with BlueHost so that you can start very inexpensively!
Disclosure: I am an affiliate for Bluehost, and will receive a commission if you sign up through my referral link. This is at no additional cost to you, and you will get great pricing and a free domain name through my link.
Many people want a website for their business or personal blog but have no idea where to begin. They easily get overwhelmed and end up not starting at all. Do not let this be you! With as little as 30 minutes, you can overcome this major obstacle and realize how simple it really is.
Domain and Web-Hosting:
To make a website or blog you must own a domain name AND website hosting. I’ve provided inserts for Jerry Low’s article that simplify the terms below:
- Web-Hosting: “A web hosting is a computer where people store their websites. Think of it as a house where you store all your stuff; but instead of storing your clothes and furniture, you store computer files in a web host. More often than not, the term ‘web host” refers to the company that rents out their computer/servers to store your website and provide Internet connectivity so that other users can access to the file on your website.”
- Domain Name: “A domain is the address of your website. Before you can set up a website, you will need a domain.”
- Domain Vs. Web Hosting: “To simplify: A domain name, is like the address of your home; web hosting, on the other hand, is the space of your house where you place your furniture”

Why Self-Host with Bluehost?
There are plenty of free blogging platforms, but I highly suggest not going that route and choosing to self-host with Bluehost. With free platforms, you do not have complete control of your content and user experience. I hate to say it, but it could easily be the deciding factor if a customer/subscriber/reader spends time on your website or even decides to come back.
Cons of Not Self-Hosting:
- You do not have complete control
- You do not own your domain
- Not seen as professional
- Your domain howdyace.blogspot.com, howdyace.blogger.com
- Annoying ads are placed on your site that are distracting and take your readers’ focus away from your content/page
- Limited to what you can do
- They can delete your content whenever they want (it is extremely frustrating and scary)
Why I Choose and Use Bluehost Personally:
- Bluehost is extremely affordable, use my link to receive a discount of $3.95/month and select the 36-months plan for the BEST pricing. That comes out to be less than 1 cup of coffee per month.
- Bluehost offers a money-back guarantee within 30 days of signing up. So you have nothing to lose by trying them out.
- Free SSL Certificate Included, $49-$69 value
- Free Domain for the first year, $10-$15 value
- WordPress through Bluehost is FREE and EASY to set up, it is automatically installed!
- Bluehost powers over 2 million websites around the world
- Bluehost offers 24/7 expert technical support. You can call, chat, or email at any time!
- ANYONE can create a WordPress blog or website, just follow along with my how-to steps below.
Click here to get started
Step 1: Buy BlueHost Basic Hosting Plan

You’ll be taken to the pricing plan page. I chose the Recommended Choice Plus Plan because of the Domain Privacy Protection, which hides your personal information from the WhoIs Database. It is a database that is publicly visible to anyone on the internet.
With Domain Privacy Protection, you are still the owner of your domain, but your personal contact information is hidden from public view. Bluehost allows you to use their information instead of you having to display yours for an added layer of security.

But looking back I didn’t need all the extra bells and whistles of the Choice Plus Plan. The Basic Plan is likely all you’ll need at first and you always have the option of upgrading later. Therefore, I highly suggest purchasing the basic plan for 36 months + then adding Domain Privacy Protection as a package extra. It is $.99/month, which is billed annually at $11.88/yr, definitely worth it in my opinion.
Step 2: Create Your Domain
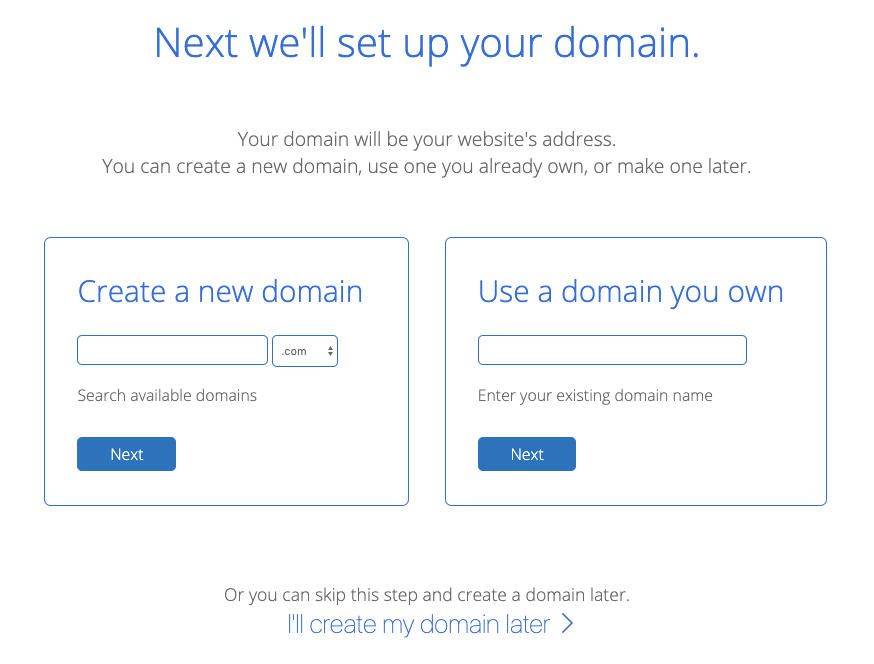
Here, you will create a new domain. Enter the domain name to see if it is available. If you already have one that you own, enter it in the second box. You can skip this step and create a domain later as well.
By using my link and self-hosting with Bluehost, you will get your domain free for 1 year.
Step 3: Input Account Info
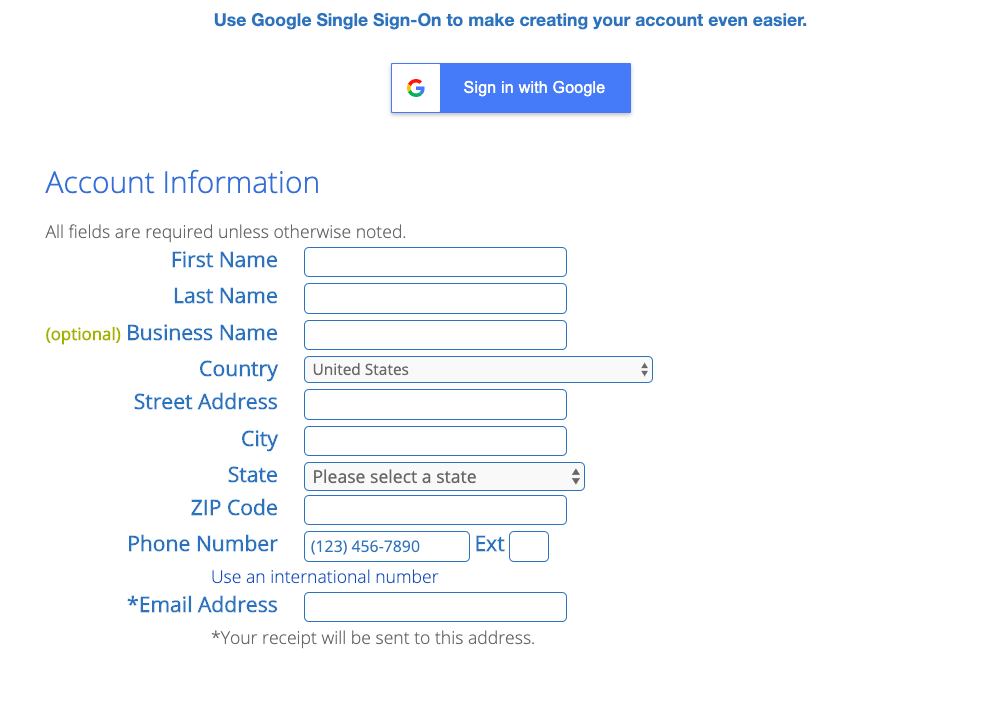
Enter your account info or use Google Single Sign-on to create a more seamless process.
Step 4: Pick Account Plan
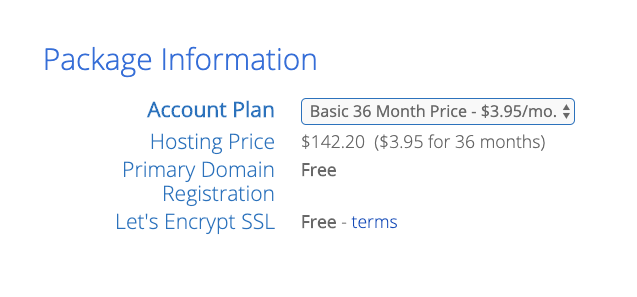
Review the package information.
The BEST pricing plan is the 36-month plan at $3.95/month or $142.20/year that must be paid in full upfront. You also have the option of 24 months for $4.95/month or $118.80/year and 12 months for $5.95/month or $71.40/year that also must be paid in full upfront.
With each option, you will receive a FREE domain for a year ($10-$15 in savings) and Encrypt SSL ($49-$69 in savings). SSL stands for Secure Socket Layers which “is the standard security technology for establishing an encrypted link between a web server and a browser. This link ensures that all data passed between the web servers and browsers remain private and integral” from www.SSL.com.
Step 5: Get Domain Privacy Protection
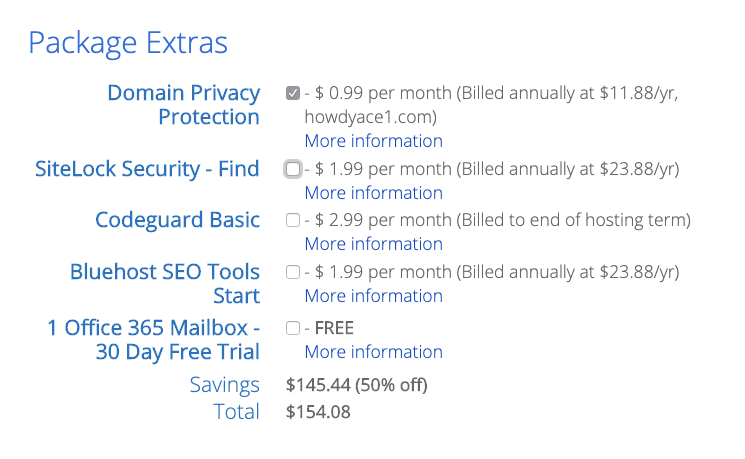
As mentioned above, the only package extra I advise purchasing is the Domain Privacy Protection to hide your personal information from being displayed all over the internet. Uncheck all the other boxes and continue on to payment information.
Total Cost per year + Domain Privacy Protection @ $11.88 per year:
- 36 months @ $3.95/month: $154.08
- Savings: 50% off $4.28/month
- 24 months @ $4.95/month: $130.68
- Savings: 41% off $5.45/month
- 12 months @ $5.95/month: $83.28
- Savings: 33% off $6.94/month
Even if you choose the 12-month plan, it comes out to less than two cups of coffee or one adult beverage per month which is fairly inexpensive. I promise that you will not experience any lifestyle hardships from missing two cups of coffee or one happy hour drink per month.
Step 6: Enter Payment Information

Step 7: Confirm Bluehost Terms and Services

Read and review Bluehost Terms of Service, Cancellation Policy and Privacy Policy. Then click Submit to confirm that you agree with their policies. Follow the on-screen instructions to create a password. Next you will install WordPress on Bluehost
Step 8: Connect WordPress on BlueHost

Bluehost makes it very easy to create a WordPress blog for FREE. It is automatically installed for you. All you have to do is click ‘Log In’ and choose a theme. There are plenty of free themes to browse from. If you do not like the generic themes, you can upgrade to a premium theme (I use Divi and can create a post if you are interested). Don’t worry if you aren’t 100% satisfied with the theme you choose, you can always go back and change it later.
WoooHoo! You now have a WordPress blog!
Step 9: Customize Your Theme
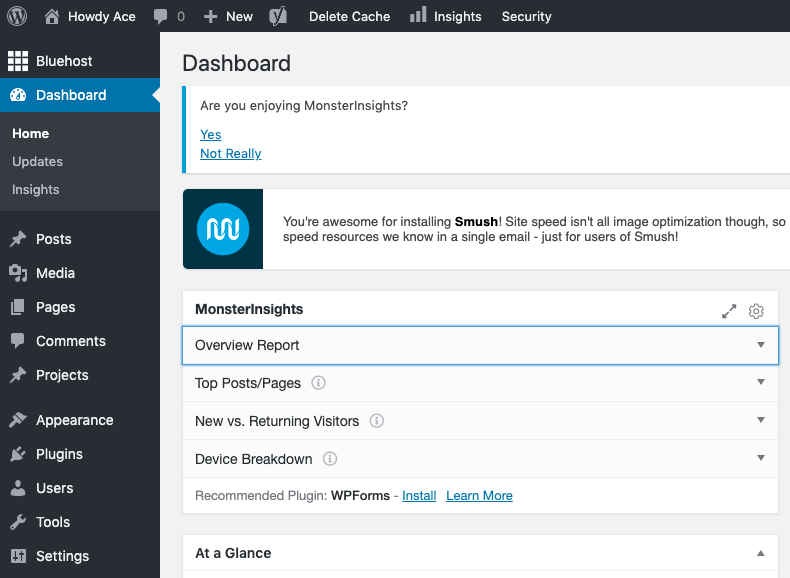
Your next steps will be to get familiar with the WordPress dashboard and begin to customize your theme. There are plenty of resources on the internet that will help to customize your blog/website to your liking. I suggest looking at a few websites that you like, outline a few things that you want to have, and start from there.
You Did It!
Congrats, you’ve conquered the first steps that so many people are afraid to tackle.
The hardest part of the journey is taking the first step. Wasn’t so bad now, was it?
If you sign up with my Bluehost link and are confused for any reason (such as how to set it up, picking a plan, pricing, etc.) you can reach out and I’ll be happy to help! Don’t hesitate to shoot me an email at connect@howdyace.com.
Also, don’t forget to subscribe below!
[convertkit form=1205274]
Thank you so much for your time and energy!

This is so helpful- thank you!
Catherine!
Thank you so much for taking the time to comment and leave some feedback. I’m so glad that it was helpful for you.
I can’t wait to see what you create! As always, let me know if there is anything that I can help with!